Home Grow chronicles Dianna’s personal journey as a medical cannabis patient who registered and was approved by the Canadian government to grow cannabis in her home. Dianna’s experience is one grower’s point of view. Her ideas are neither the best nor the only proven methods for growing medicinal grade cannabis.
5, 6, 7, 8, it’s time to defoliate. Learn some defoliation techniques from Boveda blogger Dianna Donnelly. Defoliating cannabis plants is a must if you’re an indoor cultivator like Dianna and you don’t have a huge burning ball of gas shining down on your home grow.
According to some cannthusiasts, sun-grown cannabis will always be superior. We say that no man-made light source can ever replicate what the sun, moon and stars do in a season. Add a perfect climate to that natural light source, and the yield can be massive.
WISH THEY ALL COULD BE CALIFORNIA CANNABIS GIRLS
To be honest, California growers on cannabis forums, sound like a bunch of “Big Fish” storytellers to this Canadian. Then I researched Cali’s growing environment. Warm morning dew, coastal breezes and generous sunshine help cannabis thrive there. And yes, produce more yield than imaginable.
My eighth-floor indoor garden will never match conditions like that. My girls don’t know the sun. They’ve never met her. Prior to their delivery, I learned all plants crave consistency. So all my girls know is the warmth of man-made lumens.
And though my ladies are thriving at the end of vegetation mode, I know very well how much bigger they’d be if I had been lucky enough to raise them outdoors. (Parental guilt sinks in.)
By the way, in Canada, a medicinal cannabis patient can also register to grow her medicine outdoors. It’s as simple as checking a different box on the Access to Cannabis for Medical Purposes Regulations (ACMPR) application, which an agreeable landowner then signs. (Thank you, Supreme Court of Canada).
As of June 2018, 21,541 Canadians have registered to produce their own medicinal cannabis—includes indoor and outdoor grows.
HOW TO GROW BIGGER BUDS
One of the main goals for cannabis growers is getting thick, dense flowers. Want big buds? Get a better light source!
From the many cannabis forums, opinions, and articles I’ve read, light strength is the single most effective way to turn thin, wispy cannabis flowers into dense nugs. Too often we pre-judge weight by the fullness of that flowering cola. Post-harvest, flower weight drops if you don’t properly dry, cure and store your yield. Nugs will continue to hold their size, weight and potency when you cure and store them with Boveda. (More about that in upcoming Home Grow posts.)
WHAT PRICE GROW LIGHTS?
For now, I home grow within my financial means. The longer I home grow, the more money I’ll save growing my own medicine. Money I can then reinvest to upgrade my equipment.
Just think, with an outdoor home grow, I could get many more lumens at no extra charge!
The sun’s light provides 10,000 lumens for every square foot—so much more penetrating power than my small lights. Coupled with the continuous, though slow, movement of the earth’s rotation, those rays will touch almost every angle of an outdoor cannabis plant.
The light source for my home grow is two High Pressure Sodium 150W grow lights, which equal 300 watts. Compared to lighting for other indoor gardens, 300 watts might sound low. Many growers bathe indoor lovelies under 1000 watts of light. These small “breadbox” sized lights are very affordable but as I soon learned, not very efficient.
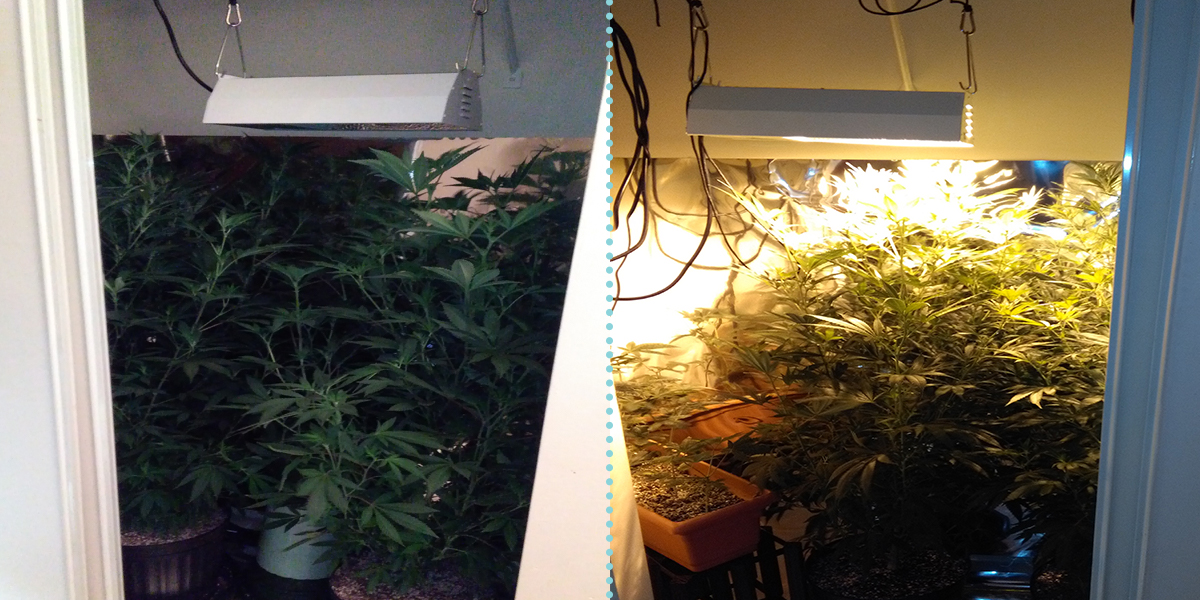
I figured that though their output is 300 watts, it’s pulling 540 watts of power! In researching better lights I learned that there are two separate parts to any light: the bulb and the ballast. The bulb offers the multiple coloured spectrums required for growing while the ballast regulates the current.
I’ve already chosen my new light for my next cultivation. The main difference is a ballast that is more efficient at regulating the current. To figure out the money I’ll save, I used this formula: kilowatts x price/kW/hr x hours used.
150 Watt HPS: 0.54 kilowatts x 0.14 cents/kW/hour x 720 hrs = $54.43 each per month!
400 Watt HPS: 0.4 x 0.14 cents x 720 = $40.32 per month
These days, grow lights are getting more efficient all the time. With the purchase of a new light with a more efficient ballast, I’ll be getting 100 watts more power for less than half the price.
This new 400-Watt hood kit from Grow Light Canada will cost me less than $250 but will offer more light for less money.
WHAT’S DEFOLIATION?
Most indoor grow lights are affixed above the plant. (Though I have seen some ingenious tracked home grow lighting systems.) Indoor growers adapt to the limitations of a stationery light source by clearing away leaves that block the light for the rest of the cannabis plant. This is called defoliation and was the last step I completed before flipping my girls into the bloom phase.
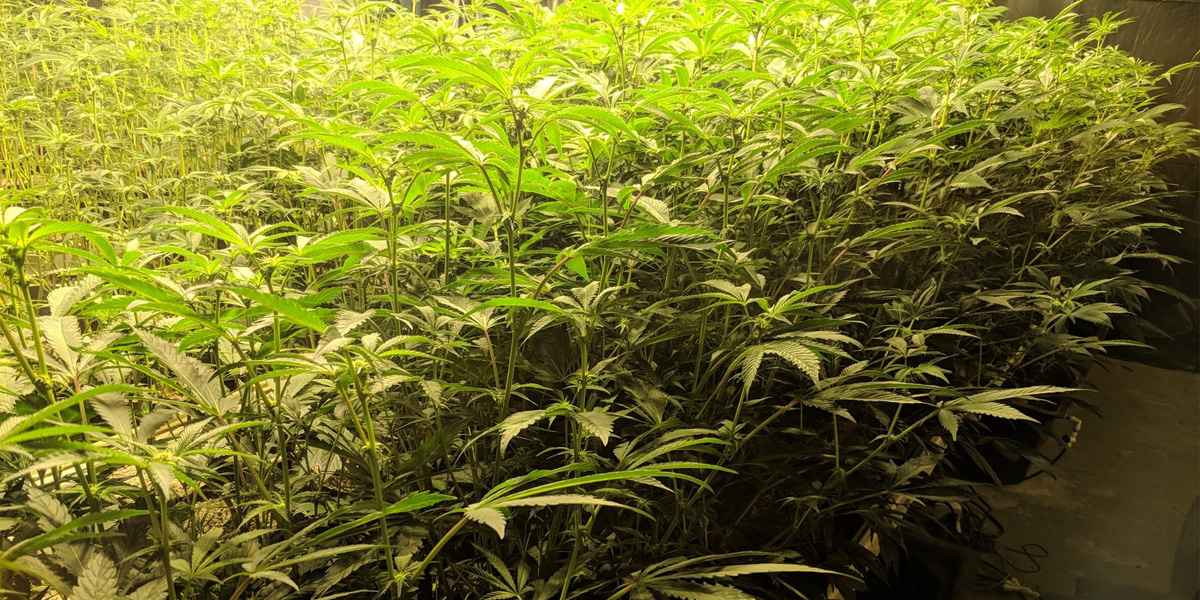
If you don’t defoliate an indoor cannabis plant, its leaves and later flowers will canopy all that grows beneath them.
Outdoors, the sun’s rays reflect off of the ground to “hit” these lower branches and leaves. No can do for artificial lights, so indoor home growers have to help out the girls.
Cultivators debate how many leaves to pull or clip. Most growers carefully select individual leaves that are shadowing others. And continually defoliate a leaf here and there every day as the plant’s architecture changes. Other home growers do a major strip-down every few weeks. I’ll try both and let you know.
Defoliation also encourages airflow throughout the plant during and after bloom transition. Fans run on my home grow day and night, so my girls have been dancing in the breeze for their entire lives. The motion strengthens their stocks and prepares them for the burden of heavy resinous flowers. (Gotta pull your weight, ladies!)
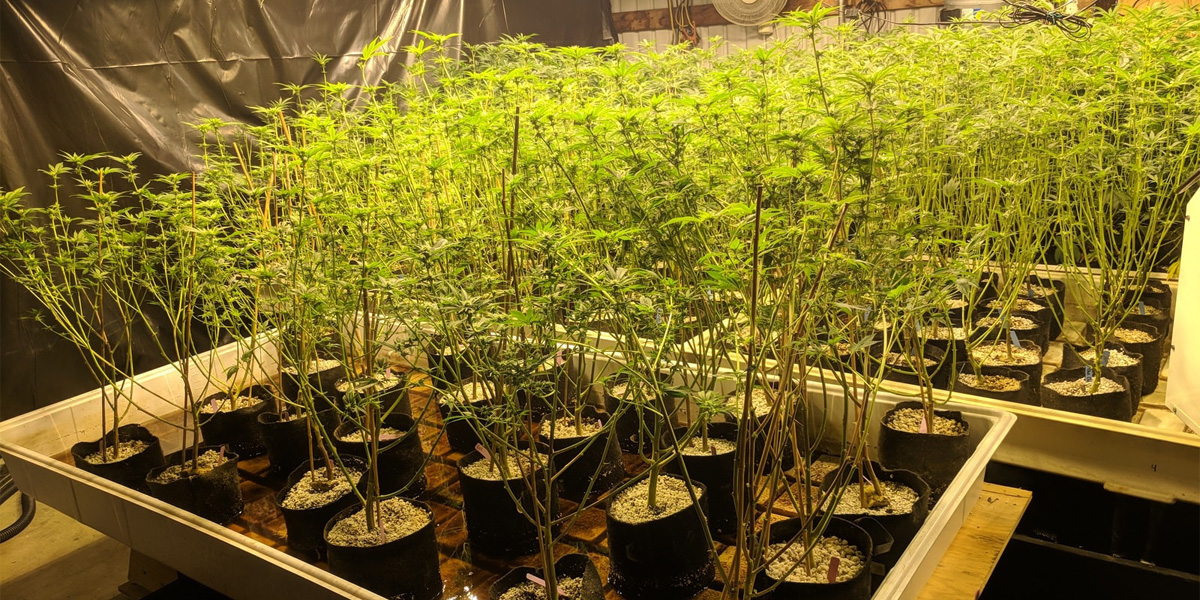
My defoliation concentrated on the larger fan leaves. While researching how to grow my medicine, I later discovered how important these big photosynthesizing machines are to the early bloom. Next time, I’ll leave more of fan leaves intact to boost bloom initiation.
STRETCH LIKE A “SEA OF GREEN”
Another very common way of working with the plant’s proclivity to create a canopy is a technique called “Sea of Green” or ScrOG. I haven’t tried this method yet, but I will experiment on a future crop. This technique stretches the branches out and when done on several plants, can look like a sea of green flowers.
Why ScrOG?
- Saves the plant from wasting energy on branches that won’t produce much yield
- Encourages airflow
- Lowers the risk of potential mold growth during the long months of flowering
Under this sea of green canopy, the very lower branches don’t see much light at all and so many people will cut them off. This technique leaves the plant looking like a popsicle.
HOW TO WADE INTO THE SEA OF GREEN IF YOU’RE A HOME GROWER
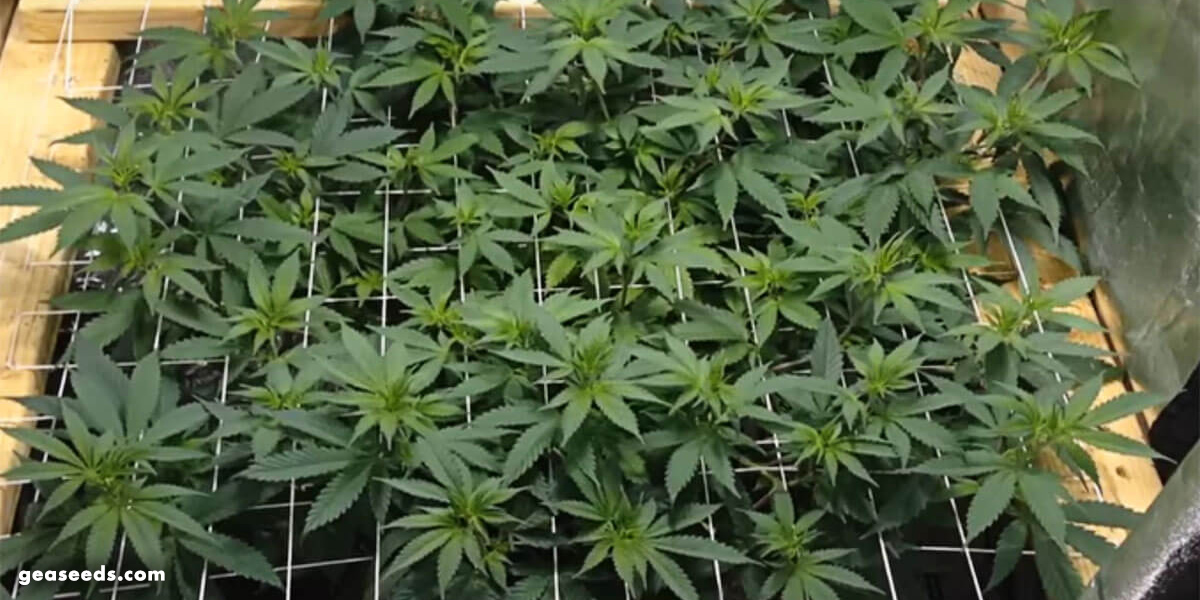
- Buy or build a net made up of approximately 4×4 cm squares.
- Stretch the net above the cannabis plants.
- Gently guide the cola through those squares, which will separate the branches and allow better light coverage and penetration. The net also gives much needed support.
- As the plants grow, raise the height of the netting.
UP NEXT? CANNABIS BLOOM PHASE
In just a few days, my girls will transition to another crucial phase of their lives: the bloom phase. How does this happen? Stay tuned for our next adventure!

– Dianna Donnelly
Dianna Donnelly is a cannabis educator, blogger, and freelance writer living in Kingston, Ontario. She counsels new patients on the safe and effective use of medicinal cannabis and believes that with enough time, cannabis, and coconut oil she can heal the world.
Dianna Donnelly’s posts are being provided for informational purposes only; they do not constitute an endorsement or an approval by Boveda of any of the products, services or opinions of Dianna Donnelly. Boveda bears no responsibility for the accuracy, legality or content of this post or links to the posts. Contact Dianna Donnelly for answers to questions regarding her content.
Home Grow #9: Transition to Bloom


