

If you live in one of the increasing number of places where weed is legal, check your local laws around growing. Many states allow you to cultivate between four and eight plants at a time, enough to last a while.
That said, growing cannabis is a tad more complex than, say, growing a tomato. It takes patience, attention to detail, and careful planning to glean a healthy, tasty stash. And one of the most critical aspects of that long journey comes right near the finish line: harvesting.
Below, Boveda explores how to time your cannabis harvest to snip those buds at their peak and offers a few techniques and tips for the process.
Understanding the Right Time to Harvest
One of the most common pitfalls of novice growers is improperly timing their cannabis harvest. Maybe they get eager and snip those buds before they have a chance to reach full maturity. In these cases, the grower is left with underdeveloped trichomes (read: muted-tasting cannabis) and less potency.
Or perhaps they absentmindedly allow their plants to over-mature. In these scenarios, potency also takes a nosedive. Plus, as Royal Queen Seeds points out, “you run the risk of self-pollinating and rotting.”
You want to aim for the sweet spot. Below, we discuss two methods for timing your harvest: one ballpark and the other exact.
Ballparking the Harvest Date with Strain-Specific Harvest Times
You can’t rely wholesale on strain-specific cannabis harvest times, but they can give you a good indication of when you should start paying attention.
In short, Indica strains tend to require harvesting eight weeks or two months after flowering. Sativa strains need a little longer to mature, often producing a harvest date ten weeks after flowering. And if you started your journey with an autoflower, the whole lifecycle from seed to harvest can be as short as eight to 12 weeks.
However, it’s important to note: Do not rely on these guidelines alone. There are many types of weed, and every plant is different. Every growing environment varies, too, according to light and nutrients, affecting maturation.
Looking for Signs of Maturity
Using your senses is the best way to know when your bud is ready for harvest. At the early end of the guidelines above (ideally earlier), start inspecting your plants daily for some tell-tale maturation signs. These include:
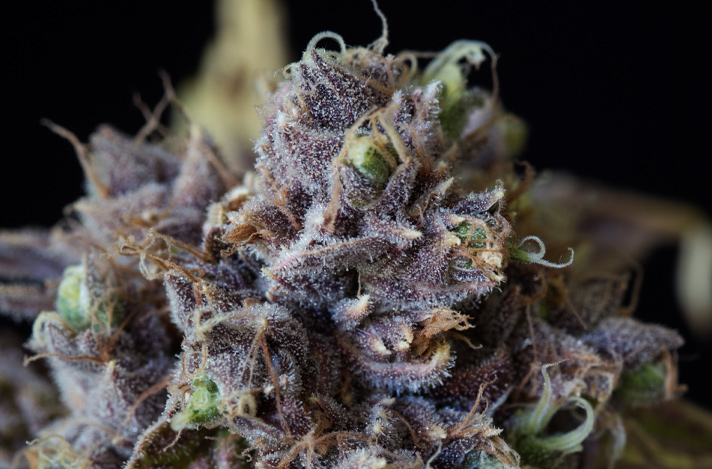
- The Trichome Coloration: This is the big one, the one that often tells growers all they need to know. It involves breaking out your magnifying glass and inspecting the trichomes, those sticky glands shooting out from the flower. Trichomes start out clear, an indication that they’re too young to harvest. They then turn milky, then a darker amber color. The general consensus is to harvest cannabis buds when most of the trichomes are milky, but a few might still be clear, and a few might have progressed toward amber.
- Pistil Development: If you’re familiar with dispensary cannabis, pistils are those orange “hairs” dotting the bud (they’re the sex organs of the plant, FYI). Like trichomes, pistils start out white, before turning that familiar shade of orange. Conventional wisdom holds that the THC concentration is the highest when the vast majority (85-95%) of your pistils have turned orange.
- Fan Leaves Yellowing: Lastly, you can look to natural leaf aging as a sign of maturity. As fan leaves reach peak maturation, they begin to yellow. Consider this sign in conjunction with the two above for a solid indication that it’s harvest time.
How to Harvest Your Haul: A Checklist
Harvesting cannabis isn’t challenging. However, it’s possible to spoil a good yield if you don’t know what you’re doing. To get the best yield possible and ensure its safe transformation into tasty, smokeable, high-quality weed, follow the straightforward checklist below.
Start a Schedule
This isn’t a glamorous tip, but it’s beneficial for keeping everything organized. Create a schedule at the time of flowering/planting with the rough, strain-specific harvest times mentioned above. As you near that date, leave schedule spaces for notes; you can write descriptions of the plant according to the maturation signs above, tracking its progress. Later, you will write the harvest date/drying date, and then the curing date. You can keep this data on a clipboard in your growing space.
Consider Flushing the Plant
Some growers swear by “flushing” their cannabis plant two weeks prior to harvest to reduce harsh-burning smoke in the final product. Others don’t, claiming it has negligible impact. We’ll leave the decision up to you. If you plan to flush, follow this video guide.
Gather the Necessary Supplies
Once you notice the maturation signs listed above, it’s time to gather supplies. You will need:
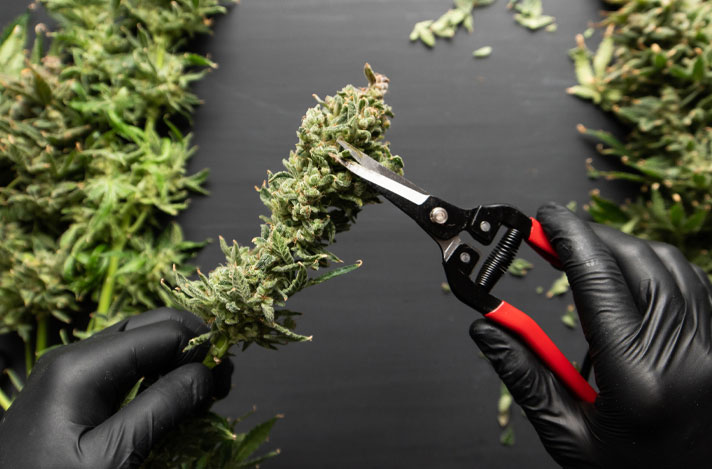
- Small and Large Pruners: The small ones allow you to detail the bud, while the large ones effortlessly cut through thick stems. Make sure they’re sharp to avoid frustration.
- Snug-Fitting Gloves: Opt for either reusable coated work gloves or disposable nitrile gloves of at least 4 mil for trimming, growing, and handling cannabis.
- A Trim Tray: Basically, you want something that comfortably fits on your lap. Pricier options include an inset 150-micron screen to catch any falling kief.
- Rubbing Alcohol and Rag: Cannabis is remarkably resinous right off the plant, which can gum up your pruners pretty quickly. A nearby rag and rubbing alcohol setup allows you to keep things clean.
Those are the strictly necessary items. However, most growers will tell you that a good podcast or TV show is equally essential, helping you pass the tedious trimming time.
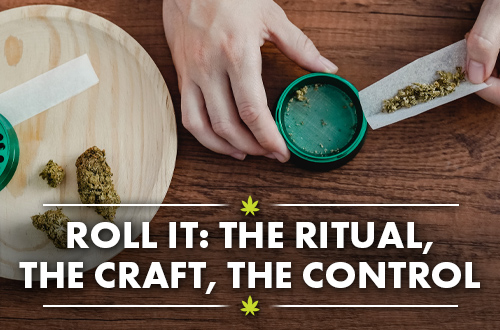
Wet Trimming or Dry Trimming?
Finally, it’s time to harvest… almost. First, decide whether you will “wet trim” or “dry trim” the plant. Wet trimming entails trimming the buds right after harvest, before drying. Dry trimming is when you hang the whole thing to dry for a few days, including the leaves, before trimming the buds. Wet trimming is easier (the sugar leaves and fan leaves snip away easier when the plant is still moist). However, those leaves will protect the bud during the drying process, preventing buds from drying too quickly.
Whichever method you choose, chop down manageable branches. Trim the fan leaves, then “buck” the buds from the branch by snipping them at the base. Break big buds down into normal “nugget” sizes, which allows them to dry more evenly without risking mold penetration.
Dry and Cure
Drying and curing weed are essential steps in the harvest. They drive away moisture, break down harsh-tasting chlorophyll, and generally improve the flavor and potency.
Dry the buds/branches in a dark room (at around 65 degrees Fahrenheit, 60% RH) on a line or mesh rack for two or more days. On day 2, you can give them a squeeze to track their progress.
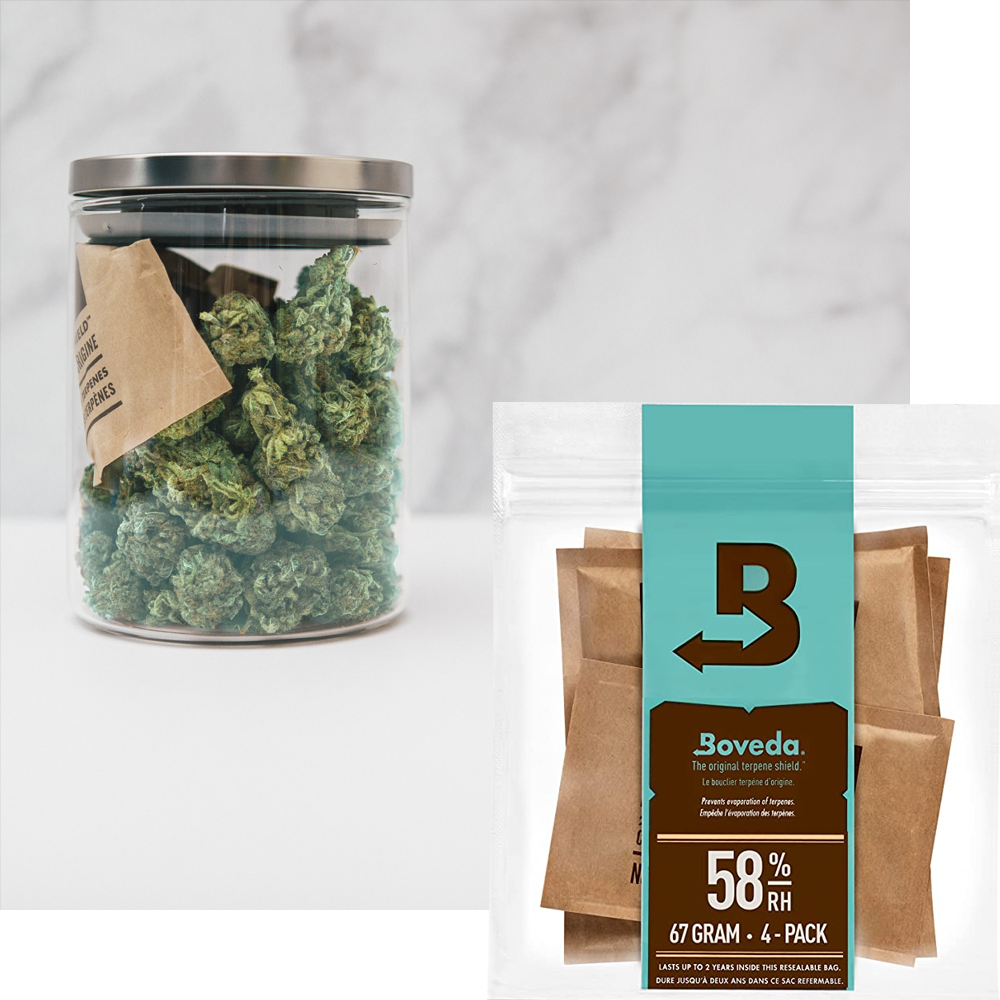
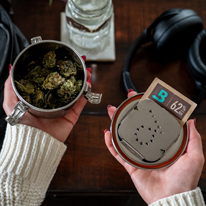
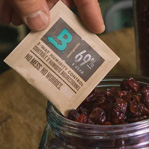
Next, move the buds to airtight containers for the cure. If you manage to stay patient through the cure, you will be rewarded with a windfall of great-tasting cannabis. Protect the fruits of your labor and store like the pros: invest in a couple CVault Cannabis Storage Containers specially engineered for home growers. For more resources on cannabis growth, like germinating weed seeds, check out past articles on the Boveda blog. Happy harvest.